Configuration
Web service
MAGS monitoring and configuration are based on a web interface. The magsCCONF program assists with configuring and installing/managing the MAGS web server. magsCONF will start automatically after installation or can be started later at any time from the program files folder chosen during installation:
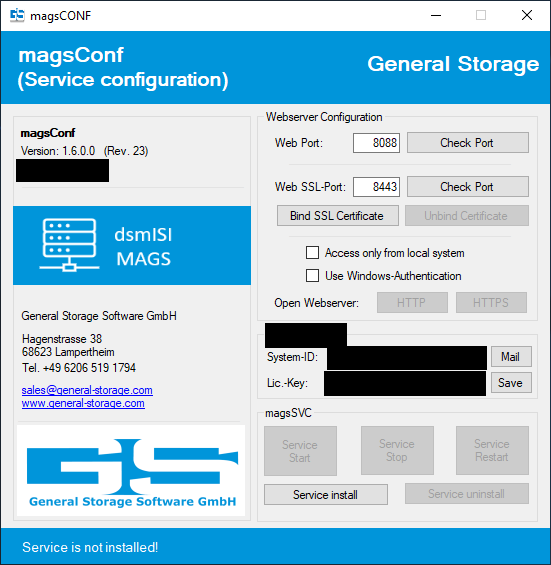
Web service status can be seen at the bottom of MAGSCONF. When you first start MAGS, the service won’t be installed. In order to configure the web service, first chose an appropriate port. “8088” is set by default but can be changed to any IP port you may have available and reachable through firewalls or port mappers at your convenience. Additionally, you can choose a port used for the SSL-enabled HTTPS-Sites. Before installing and activating the service, please make sure the port isn’t in use by another program by clicking on the “Check” button. MAGSCONF will indicate after a few seconds whether or not the chosen port is available.
When using an SSL Certificate, use the “Bind SSL Certificate” button to either create and use a self-generated certificate or to copy a thumbprint of any existing certificate and use it for the website. If you later want to disable the SSL-Certificate for the WebGUI, click on “Unbind Certificate”.
Activate (Check) the box next to “Access only from local system” if you don’t want to administer MAGS from the outside. This setting is helpful if you can’t open the Web Port through a firewall of there are rules permitting access to your MAGS server via http. If you chose that option, administration is only possible from the same machine you installed MAGS on via a web browser using the loopback address (127.0.0.1 or localhost).
If you want only authorized Windows domain or local users to be able to access the MAGS web interface from the outside, don’t check “Access only from local system” and check “Use Windows Authentication” instead. This activates inherent authentication. There will be a file setup in root folder of the drive you installed MAGS on (typically “c:") called “magsAuthmagsAuth.dat”. Any access to the MAGS web interface will be controlled through the file access permissions for that file. Anybody given read access to magsAuth.dat can access the web interface. It is recommended to revoke access to this file for all users except those users or groups who are supposed to have access to MAGS’ web interface.
Deactivating both options will mean that any user with access to the MAGS server’s IP address will be able to connect.
Proceed by clicking on “Service install”. Confirm the following prompt by clicking “Yes”. Once the service has been initialized, the status will change to “Service: Online” and the related buttons (Open, Start, Stop, Restart and Uninstall) will become available.
From a service manager perspective, MAGS is now active as a service (magsSVC) running with local system account privileges and starting automatically with delayed execution and listening to the port configured in MAGSCONF as “web port”. You may stop, start and restart the service either from the Microsoft service manager or via the accordingly labelled buttons in MAGSCONF.
Once the service is running, you can access it from any web browser by entering the address of your mags server followed by a colon and the given port (i.e.: http://mymagsserver.mycompany.com:8088) or by clicking on “Open Webserver-Startsite (local)” on the machine itself, provided a web browser is locally installed:
Backup instances
All job definitions should be handled through the MAGS web GUI. While it is possible to directly edit MAGS option files with a UTF-8 capable text editor, it is not recommended to do so. Start the GUI by pointing your web browser at the address you defined during installation. On a fresh installation, MAGS will report that no backups were found.
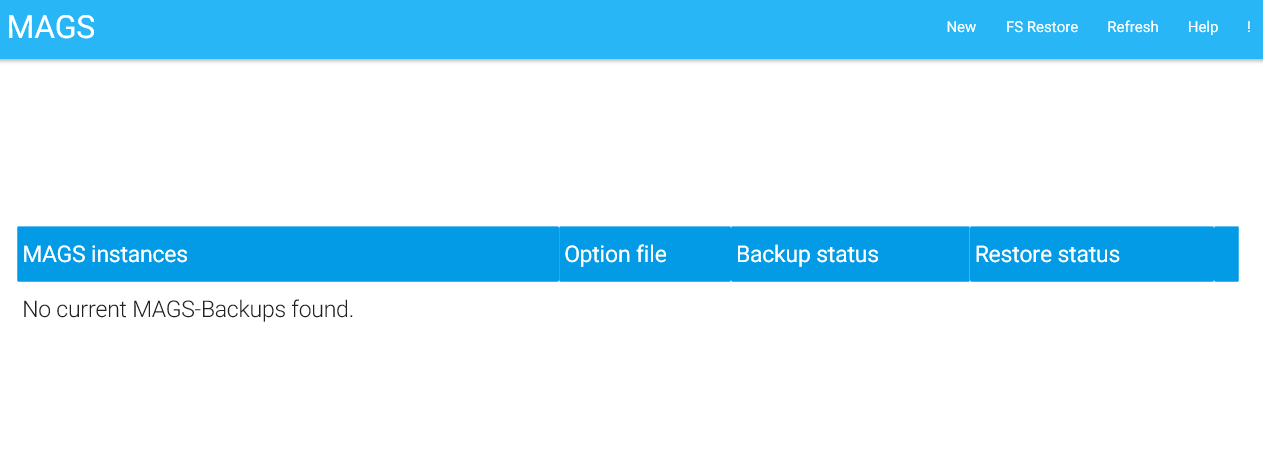
Click on “New” in the menu strip at the top of your window to create a new backup instance. A backup instance results in a MAGS option file (.mags) which contains all the information MAGS needs to backup a certain scope of data. Within the scope defined by a backup instance, you may handle as many file systems as you like but per instance you may define only one STORAGE PROTECT client option file. So in most cases, a single MAGS backup instance can handle all backups and there is no need to split it up into separate jobs – but you will definitely have more than one MAGS backup instance if you want to access more than one STORAGE PROTECT servers or use more than one STORAGE PROTECT node.
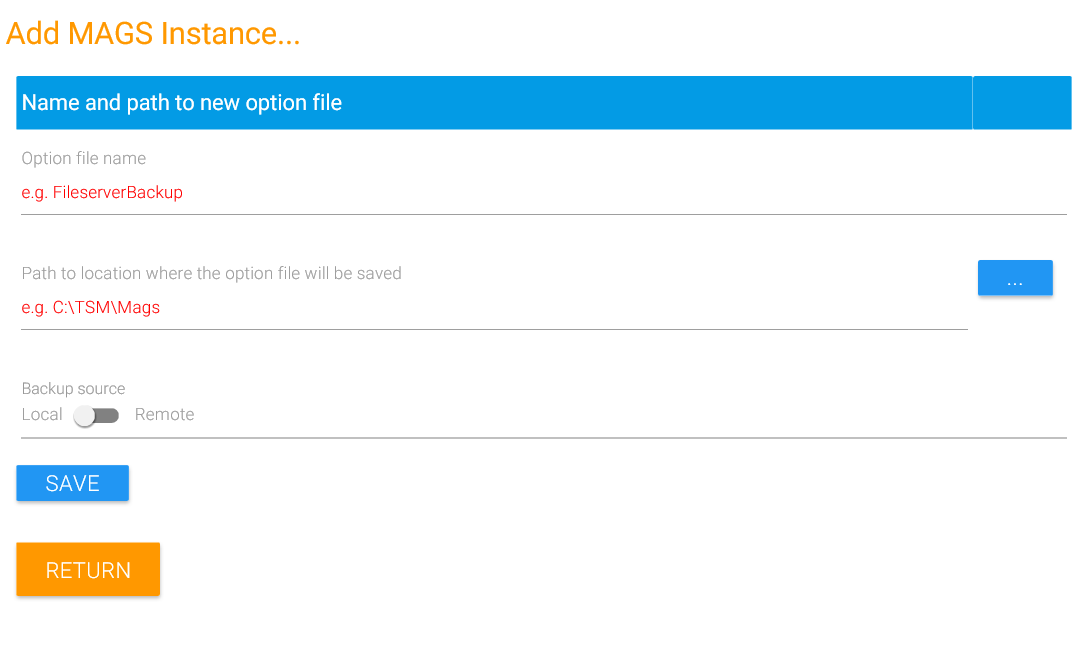
“Option file name” is the name of the file where all MAGS definitions for the new backup instance will be kept. We recommend to use a name which reflects what that backup instance is supposed to achieve (i.e. Netapp1toTSM2).
Select a path on the MAGS server where the new MAGS option file will be created.
Decide whether this backup instance will be used to backup Windows type file systems (NTFS, CIFS) with the STORAGE PROTECT client installed locally on your MAGS server (“Local”) or whether this backup instance will be used to backup Unix type file systems (NFS, XFS, BTRFS, ext4 etc.) with a STORAGE PROTECT client installed on a Linux machine (“Remote”).
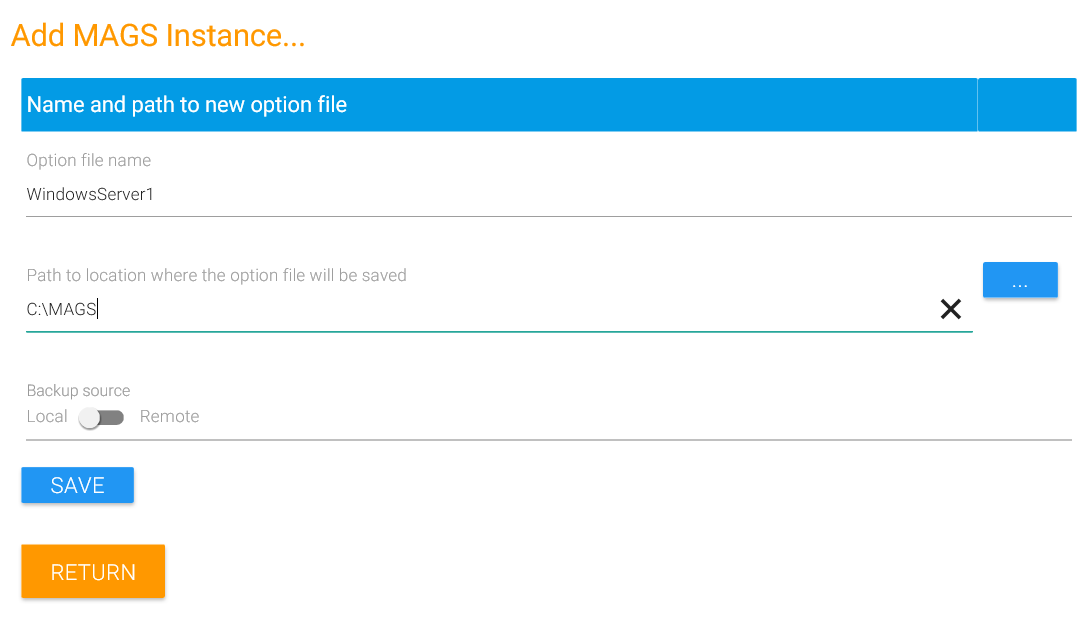
Click on “Save” to create the new MAGS option file. Once the file has been created, you will see the configuration assistant for the new instance. Here you have several settings to configure. Some are only available when configuring either a local or a remote MAGS instance.
Permission considerations
Most problems arising with a fresh MAGS setup are related to permissions.
In order to eliminate these before starting with MAGS, you should try a “dry run” for backing up the data in question.
If you want to backup data from “\myservermyshare” with MAGS and your STORAGE PROTECT client is already set up and configured (dsm.opt points at the correct server with the correct node name, passwordaccess generate is set and initialized and so on), you can just enter dsmc incr \myservermyshare-subdir=no and see whether that works.
If it does, note the AD user you’ve been doing that with and proceed. If it doesn’t and STORAGE PROTECT refused to backup with a permission problem, you’ll have to use or create a user which has the correct permissions to backup from that resource.
Note
Whatever you do subsequently with MAGS will always have the same permission restrictions as what you do interactively with dsmc. That includes the MAGS service as well as the scheduler you’ll probably use to trigger MAGS backups automatically as well as anything you do interactively with MAGS from the command line. Please do refer to your file server’s and IBM STORAGE PROTECT’s client documentation for how to resolve permission problems – especially when backing up from NAS filers.
System configuration
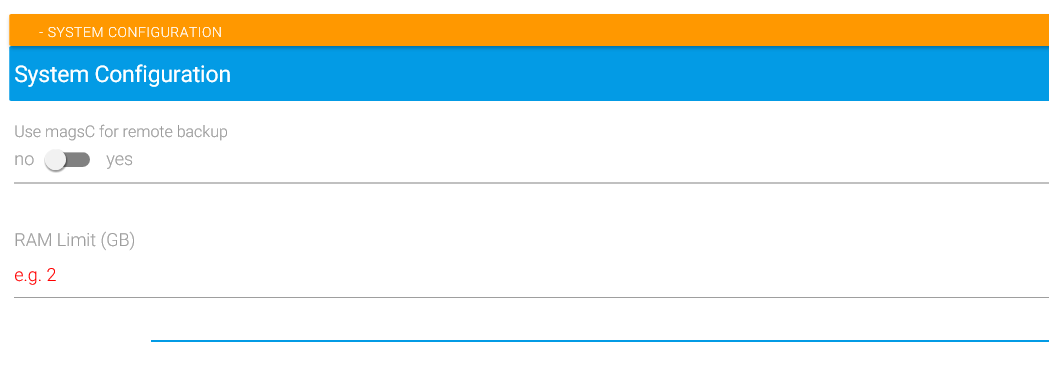
Use magsC for Remote Backup (remote)
Since MAGS 1.6, you have two different methods of running remote Backup jobs with MAGS:
Without magsC: Each backup command (dsmc) is seperately sent to the remote system and communicates with the MAGS system to update its status
With magsC: The executable “magsC” will be sent to the remote system and starts the backup jobs on its own. This means there will be less overhead due to communication between the MAGS system and the remote system and performance will be better in most cases.
Caution
Since magsC acts differently to magsX, in cases where many jobs start in parallel, some linux systems will reach the configured limits for open files. Keep an eye on system messages and consider tuning limits for the system and/or the mags user on the remote system. Examples can be found in Open File Limits.
RAM Limit
“Ram limit” determines how many gigabytes of RAM have to be available before MAGS starts a new backup session. In constrained environments with limited resources, we recommend to use low setting like 1 or 2 in order to allow the STORAGE PROTECT clients started by MAGS to use as much RAM as possible. As a rule of thumb, it may be a good idea to start with 10% of the physical memory the machine has and adjust this value up or down depending on experience and performance.
Note
While choosing a relatively HIGH ram limit will reduce the risk of swapping, it may also lead to wasted performance potential because MAGS will refuse too often to start additional sessions when under heavy load. So relatively LOW ram limits are the more aggressive and more risky approach. If in doubt, we recommend to leave that value at its default setting. If the machine running MAGS has less than 8 GB installed, you may reduce ram limit to 1. Choosing values higher than 2 should only be necessary on systems with heavy load and more than 16 GB or ram if swapping or “out of memory” conditions have been observed.
MAGS configuration
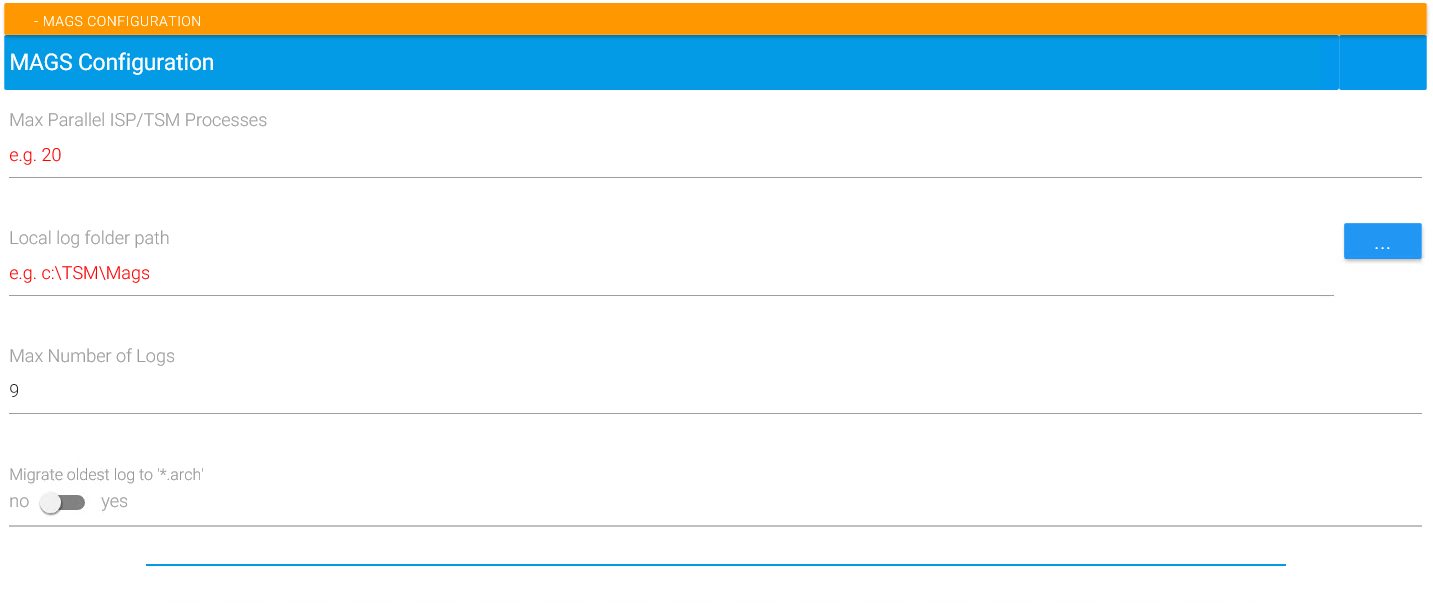
Max parallel ISP/TSM processes
Equal caution should be applied to choosing the right level of parallelism. In principle, this value determines how many STORAGE PROTECT client sessions (multiplied by the “resourceutil” STORAGE PROTECT Client setting) will be running at the same time. Naturally, the more sessions run, the faster your backup will be – however there are certain limitations to consider in terms of CPU utilization, STORAGE PROTECT session management, Network bandwidth, load on the file servers you’re backing up etc. As a rule of thumb, you can start with a maximum of three sessions multiplied by the number of logical CPU cores in your machine – so if you have a machine with 48 logical cores, you would start with a setting of 144 for “Max parallel…”.
In environments with less than 100 million files to backup, values like 10 or 20 should suffice.
Local log folder path
“Local Log Folder Path” is the place where MAGS stores its logs. There is an automatic log rotation taking place which names the current, most recent log equal to your mags option file with “.log” attached to the file name.
The previous log file is automatically renamed to “.log.0”, the one before that to “.log.1” and so forth up to “.log.9”. The eleventh oldest log will be attached to “.log.arch”.
Max Number of Logs
You may adjust the default behaviour by choosing the number of logs kept (“Max Number of Logs”).
Migrate oldest log to .arch
You may also decide whether or not the oldest backup log is appended to a “.log.arch” or deleted (deselect “Migrate oldest log to .arch”).
Keep in mind that due to the amount of objects MAGS has to handle, log files can become rather large. If you do activate “Migrate oldest log to .arch”, that “.arch” file may grow to many gigabytes in size. Please monitor the capacity of your MAGS log folder carefully in these cases and consider using a mechanism which removes the “arch” regularly to another storage (like i.e. scheduling weekly dsmc archive deletes on that file).
ISP/TSM configuration
This part of the configuration depends on wether your MAGS instance will run locally or remotely.
Local vs. remote
When configuring a local instance, make sure that you have a STORAGE PROTECT client installed and configured as well as the backup source available on the local system. The available settings for a local MAGS instance differ from a remote MAGS instance.
If you’re backing up data from a Unix machine (Linux) from NFS sources or other Unix type file systems (ext4, btrfs etc.), MAGS can use a STORAGE PROTECT client on a Linux machine. To define such a backup, switch “Backup source” to “Remote” when defining a new MAGS instance.
The remote machine MAGS will use for this backup has to be a Linux system supported by the STORAGE PROTECT client, the STORAGE PROTECT client has to be installed and configured (dsm.sys and dsm.opt properly setup, communication to STORAGE PROTECT server possible without password prompt) and has to be reachable via SSH. Furthermore, the path you want to backup has to be mounted on that Linux machine. So if you are backing up NFS resources, make sure the exports are properly mounted on the Linux machine used by MAGS and the path is known.
Once you created the new MAGS instance, configure it by providing the Linux machine’s IP address or network name under “Server IP” and the SSH port under “Server SSH-Port” (typically 22). Other protocols such as telnet are not supported. Supply a Unix user name and password. If the dsm.sys on the Unix machine contains more than one “servername” stanzas, provide the one you want to use under “TSM Servername”.
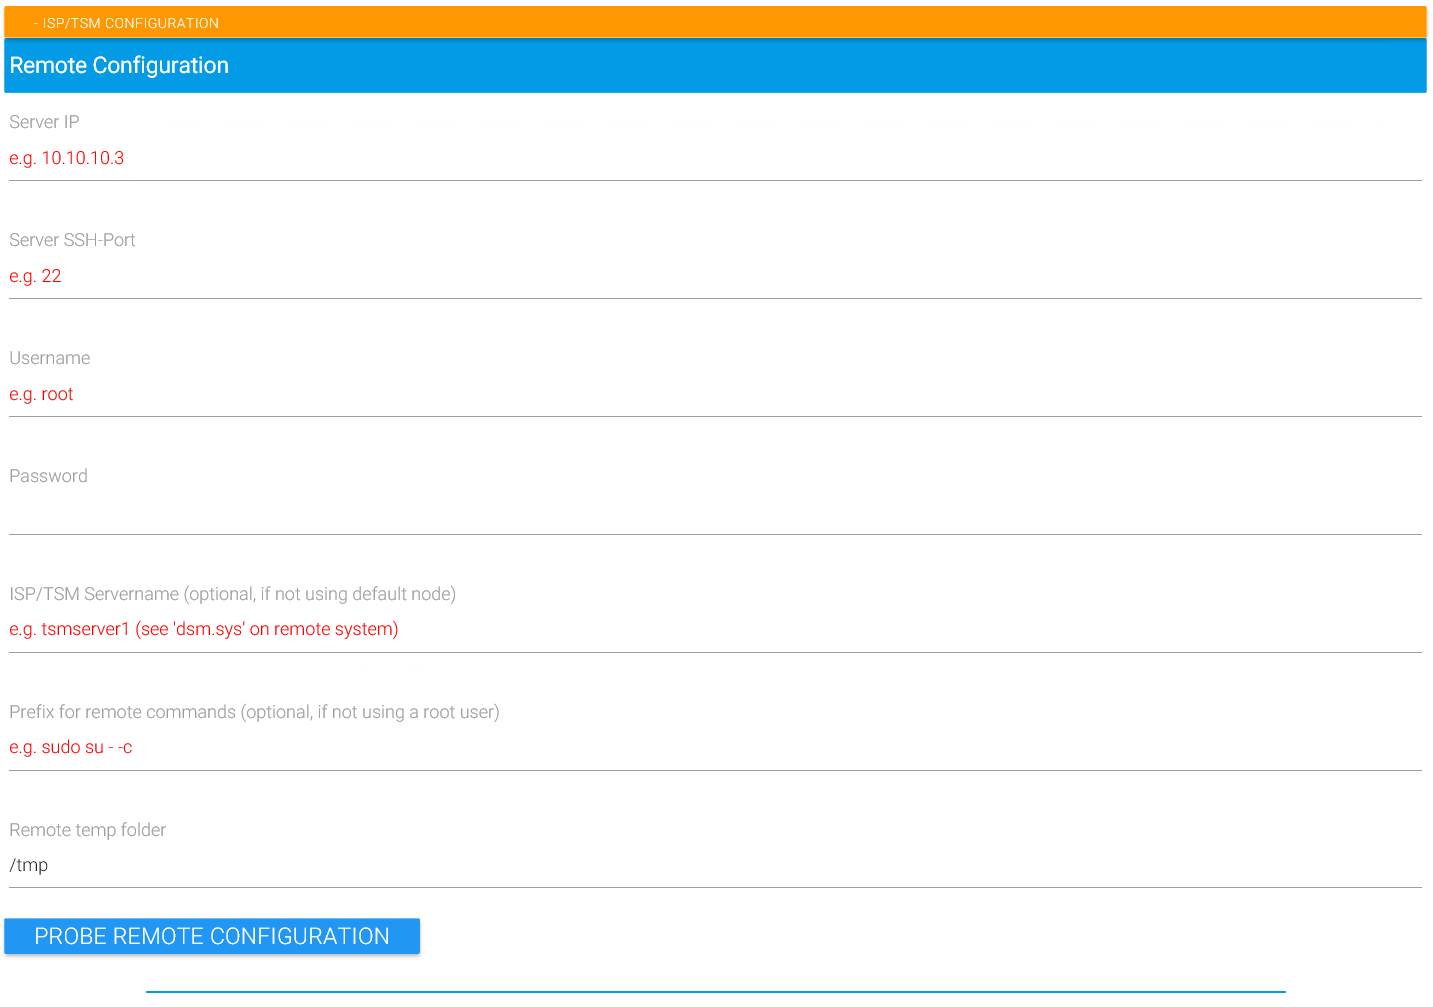
Probe the configuration and examine the result carefully to make sure that this really is the STORAGE PROTECT node and server you want to use. If probing fails, try to login to the Unix system in question with an SSH client like Putty. Make sure you use password authentication (keypairs aren’t supported yet) and the same user and IP definitions you provided to MAGS. Once logged in, enter “dsmc q se –se=servername” where “servername” is the same information provided under “TSM Servername”. Typical issues are that the Linux system has password authentication disabled or that “dsmc” isn’t included in the user’s path, DSM_CONFIG isn’t set in the user’s environment etc. Please refer to IBM’s STORAGE PROTECT client documentation for Linux to resolve these problems.
Once a remote instance has been configured and successfully probed, all further settings can be adjusted the same way as a local instance.
Caution
When using MAGS, you usually have several million files to back up at least. To not let the STORAGE PROTECT Client log size get out of hand, it is almost always useful to put the QUIET Option in your dsm.opt for windows systems or in a client option set for remote *nix clients. When using a remote instance, this is even more important since the logs have to be sent over to the MAGS system.
See also here: QUIET
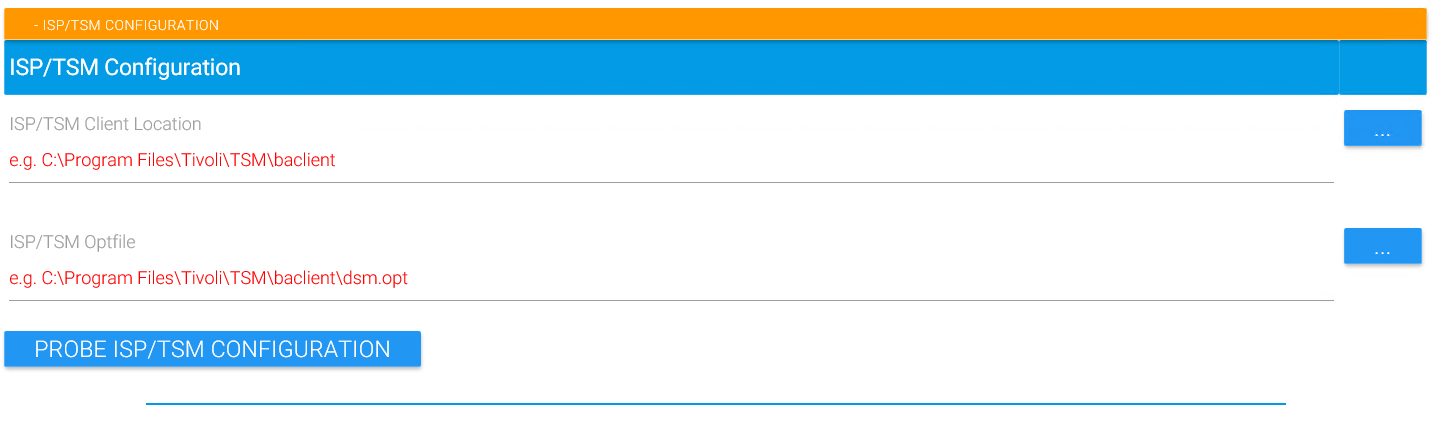
ISP/TSM Client Location (local)
This determines where your STORAGE PROTECT client lives on your machine.
Usually this is the "C:\Program Files\Tivoli\TSM\baclient" folder but you can enter/pick a different location if you chose to install STORAGE PROTECT at another place.
ISP/TSM Optfile (local)
When starting up, “ISP/TSM Optfile” is a crucial setting because it determines everything about how mags will talk to STORAGE PROTECT (which server, which node name, excludes, includes etc.). You should make absolutely sure that the “ISP/TSM Optfile” you specify is the correct one for all backups defined with this MAGS option file.
Probe ISP/TSM Configuration (local&remote)
Once you specified this entry, click on “Probe ISP/TSM Configuration”. This will start your STORAGE PROTECT client with the specified Optfile. Make sure the output of “Probe” matches what you expected to see (STORAGE PROTECT node name, server etc.). In case “Probe” fails, don’t continue until you have solved the issue. If in doubt, open a Windows command line, change to the directory you defined as “ISP/TSM Client Location” and enter “dsmc q se -optfile=TSM_Optfile” where TSM_Optfile is the STORAGE PROTECT client option file you entered as “ISP/TSM Optfile” in MAGS. If that doesn’t work, refer to IBM’s STORAGE PROTECT client documentation to solve the problem. If the client prompts for a password, make sure you have the “passwordaccess generate” client option set and the password has been initialized properly.
Note
If not otherwise constrained, it is recommended to include “language ameng” as an option in your STORAGE PROTECT client option file in order to enable appropriate reporting when the backups are running. It is highly recommended not to try MAGS with the language parameter set to anything else.
Server IP (remote)
This specifies the IP or FQDN which MAGS will use for running the backup jobs.
Server SSH port (remote)
This is the port which will be used for SSH communication between the MAGS system and the remote system. Make sure the port is not blocked by a firewall and that the ssh daemon is running and the specified user is able to connect via ssh.
Username (remote)
This is the user with which MAGS will connect to and operate on the remote system.
Password (remote)
This is the password for the specified user.
ISP/TSM Servername (remote)
On Linux/Unix STORAGE PROTECT clients, a dsm.sys configuration file can consist of more than one ISP-Serverstanza. Please specify the one MAGS should use in here (equivalent to a dsmc -se=XXXX command)
Prefix for remote commands (remote)
When specified, all remote commands will be executed with this prefix. This is useful if the specified user does not have the rights to execute dsmc but is a “sudoer”.
Remote temp folder (remote)
This is the temporary folder MAGS uses to place the magsC binary (if selected) and log files for running jobs before sending them back to the MAGS system. Depending on the STORAGE PROTECT client settings, these logs can grow up to several GB of size, so make sure that enough space is available on the underlying filesystem.
Note
Make sure that the specified user is able to write/read into/from this directory! If using magsC, the user also has to be able to execute files from here.
Backup Configuration
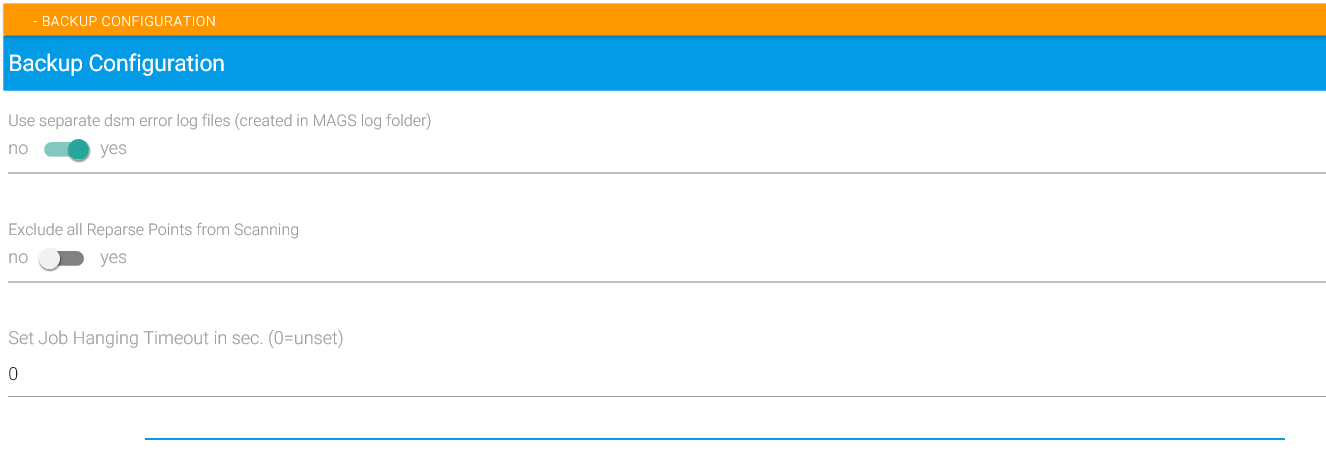
There are three additional, general settings which control the behaviour of how MAGS handles backups:
Use separate dsm error log files
One is the ability to split the client error log into multiple, individual files. This is helpful if your STORAGE PROTECT client writes without regarding thread safety into its error log.
Throughout STORAGE PROTECT’s version history, clients have sometimes been unable to keep multiple threads from writing to a shared error log at exactly the same time, messing up these logs to the point of unreadability. To circumvent this, separate error logs are enabled when creating a new MAGS job.
Added in version 1.6.
When unchecking the “Use separate dsm error log files”, please make sure that your client version is unaffected by the issues mentioned above and test its behaviour everytime you update your STORAGE PROTECT client.
Exclude all reparse points from scanning
The second option determines whether or not MAGS is supposed to follow reparse points when traversing a directory tree into file systems mounted into the tree of the file system MAGS is supposed to back up. Per default, MAGS does follow reparse points.
Set Job Hanging Timeout
The third parameter configures an optional job timeout. If this values is set to higher than 0 (zero), MAGS will kill an IBM STORAGE PROTECT client process which hasn’t answered for more than the number of seconds configured. The job in question will be noted with a “116” return code.
Consider setting this option if you’re suffering from issues where a STORAGE PROTECT process is hung up because of networking issues or problems/bugs with the BA client (such as APAR IT29661) which would otherwise lead to MAGS waiting indefinitely for the BA client to finish. We recommend to set this parameter to at least an hour (3600 seconds) and revise checking frequently whether hanging STORAGE PROTECT conditions have been fixed by IBM in newer BA Client versions. Also note, that a job which triggered this timeout has most likely not actually finished processing and leaves an undetermined number of objects unprotected.
Backup Source
The MAGS option file is automatically saved when you click on “Add Backup Path”.
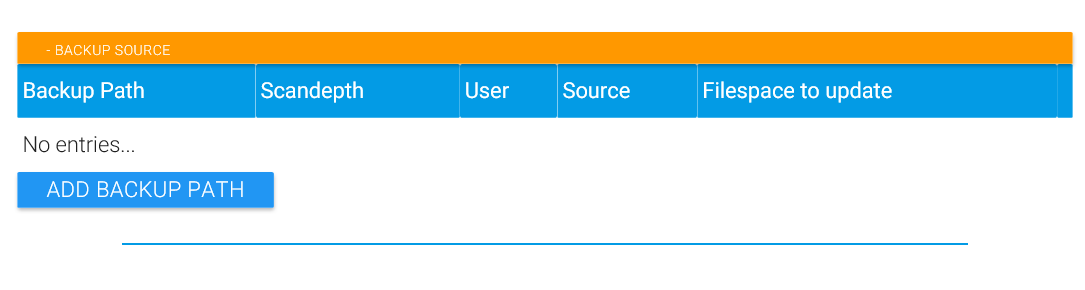
Once you are satisfied with the STORAGE PROTECT Client setup, you can start defining mags backups. A basically unlimited number of paths can be defined - however we would recommend, depending on your environment, not to run backups for more than a hundred million or so files in the same mags job.
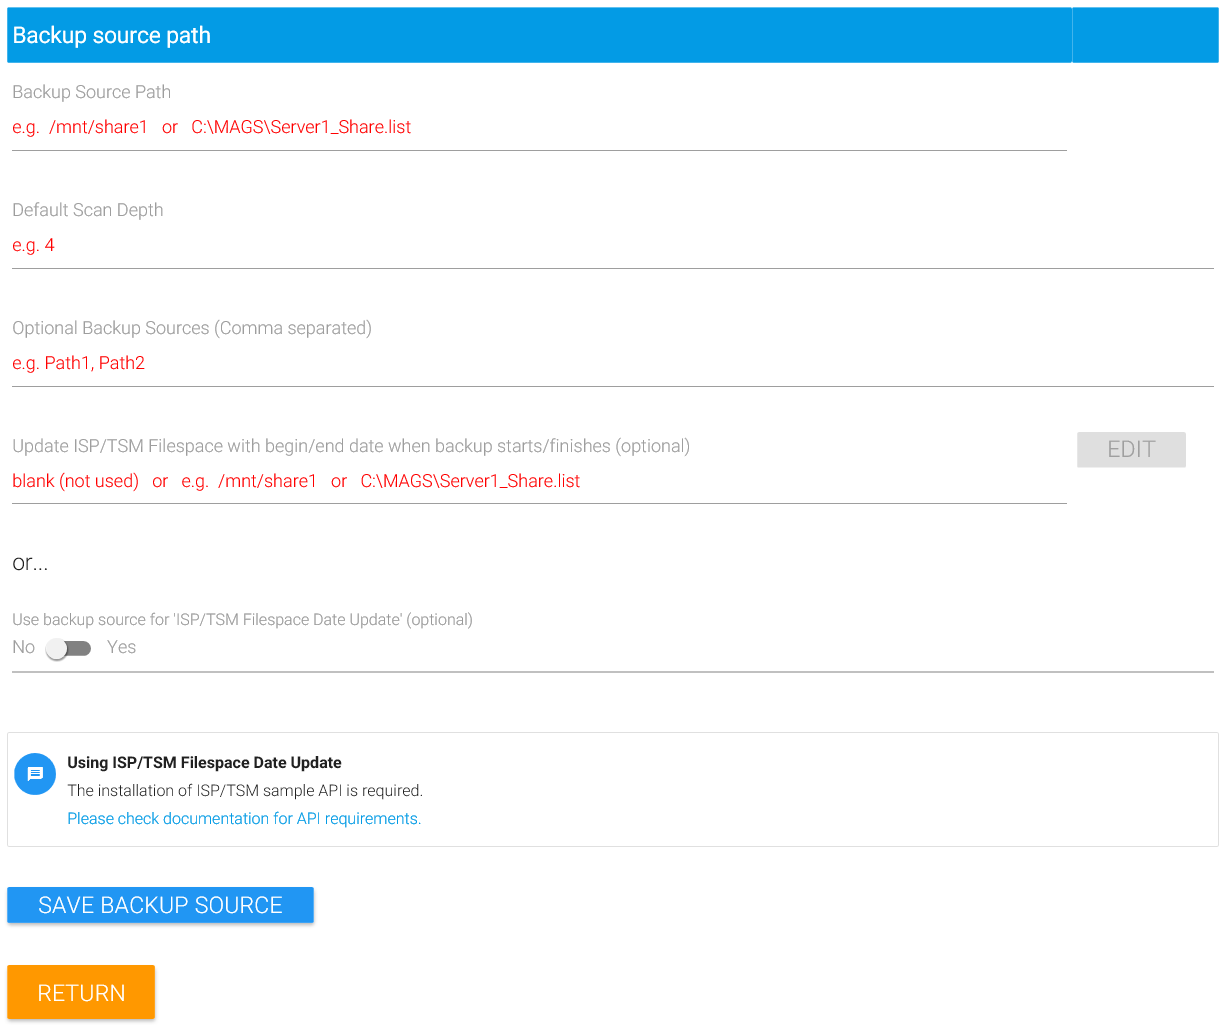
Backup Source Path
To add a path to the current MAGS instance, click on “Add Backup Path” and enter the address of the file server holding the path in question in the “Backup Source Path” field. It is highly recommended to pick a principal name rather than an address which may change and not represent a permanently addressable filespace to STORAGE PROTECT. Look up IBM’s client documentation for backing up CIFS/SMB resources if in doubt.
Once the fileserver has been defined, click on “…” behind the entry field in order to list all shares served by this fileserver (this may take some time to complete in busy environments) and pick the desired share from the resulting list or enter the desired share name directly as part of a valid UNC path without clicking on “…” first.
If your share is named “myshare” but what you really want to backup is only the directory structure “mydirectory” residing underneath “myshare”, you may enter myshare\mydirectory – so you’re not bound to only backing up entire file systems.
You can also define a local path (such as c:\data\stufftobackup) instead of a UNC path.
Default Scan Depth
Enter a “Default Scan Depth” next. This determines how deeply MAGS scans into this share’s directory structure to parallelize STORAGE PROTECT backups. There is no golden rule for this setting, but “3” is probably a good value to start with.
Optional Backup Sources
“Optional Backup Sources” are alternative ways for STORAGE PROTECT to get to the data we want to backup from the share we just defined.
For a standard fileserver like NetApp or Windows, this can be a single path pointing at a snapshot (i.e. \\fileserver\sharename\.snapshot\current).
Refer to STORAGE PROTECT’s client documentation for usage of the “snapshotroot” client backup parameter, which is essentially what is being used by MAGS when specifying an “Optional Backup Source”.
With EMC Isilon servers, this entry can contain a comma separated list of either snapshots or shares addressing individual Isilon nodes.
So if you want to backup a share called “share” via three nodes of an Isilon cluster named “isilon” which are named isilon-01 to isilon-03 on the network, you may enter “isilon” as the fileserver name, “share” as the share name and \\isilon-01\share,\\isilon-02\share,\\isilon-03\share in the “Optional Backup Sources” field in order to use these three nodes simultaneously (usually speeding up the process dramatically).
On an Isilon, you may even combine this approach with backing up from a snapshot by addressing the snaphot path rather than the original file system in “Optional Backup Sources”.
Note
If you do NOT want/have to backup from snapshots and/or through multiple nodes, you may leave the “Optional Backup Sources” field empty.
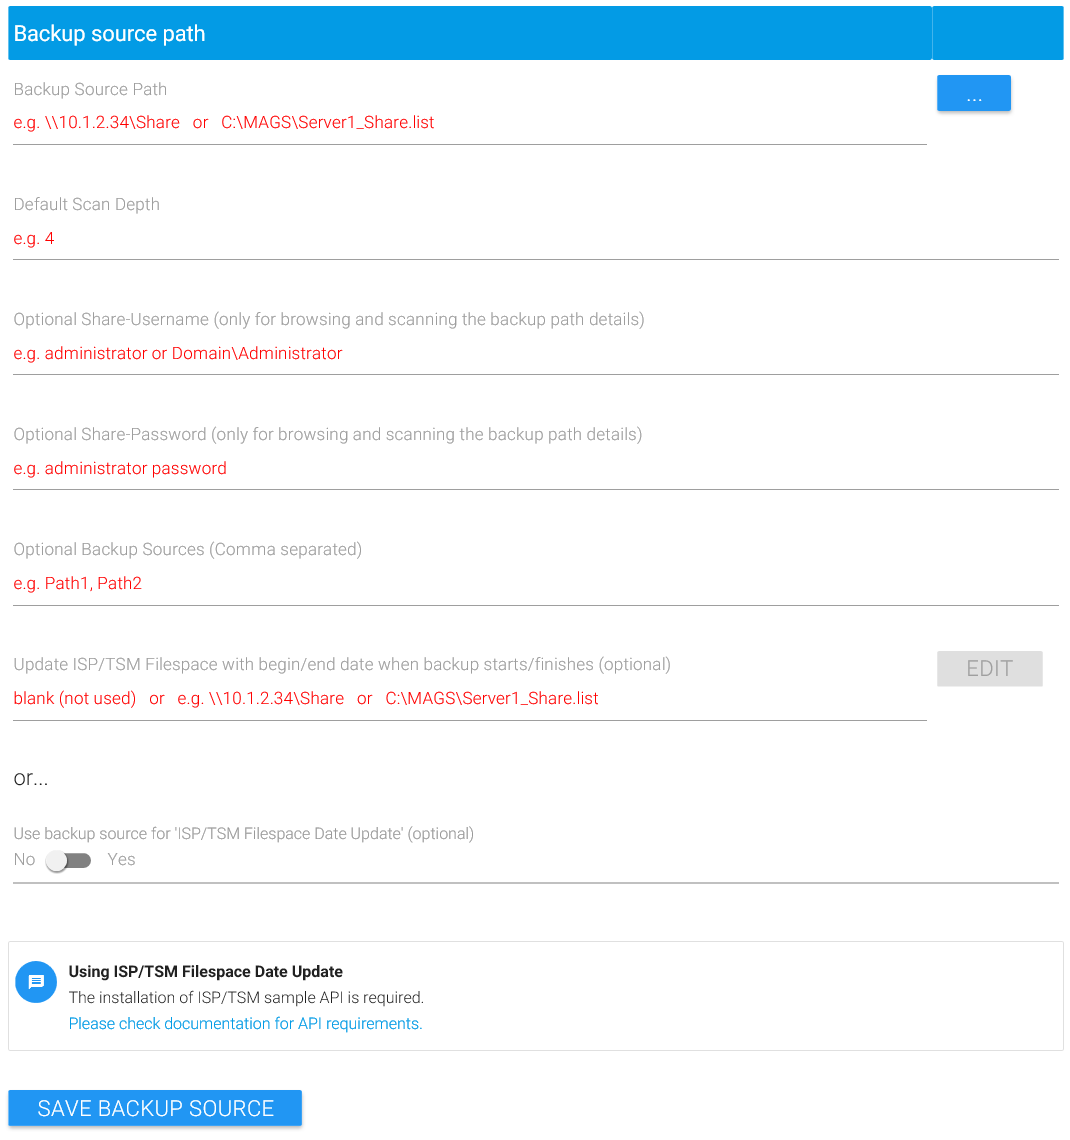
Update Filespace Information
If you want MAGS to update backup begin- and end-dates for a specific filespace within the STORAGE PROTECT server, enter the filespace name right behind “Update STORAGE PROTECT Filespace with begin/end date when backup starts/finishes” or select “Use backup source for ISP/TSM Filespace Date Update”
Caution
Usually, the filespace name is
\\fileserver-name\share-name. If that is the case, just enable “Use backup source for ISP Filespace Date Update”. But sometimes STORAGE PROTECT constructs the filespace’s name in a different manner – depending on whether or not you’ve backed up a share, a linked share or from a folder within a share or file system. Therefore MAGS lets you to enter the filespace name as STORAGE PROTECT constructed it during backup. If in doubt, connect to your STORAGE PROTECT server and look up the filespaces generated for your STORAGE PROTECT node by issuing “query filespace (nodename)”.
If you do not configure this, MAGS will not attempt to update the filespace’s backup begin- and end-dates.
Note
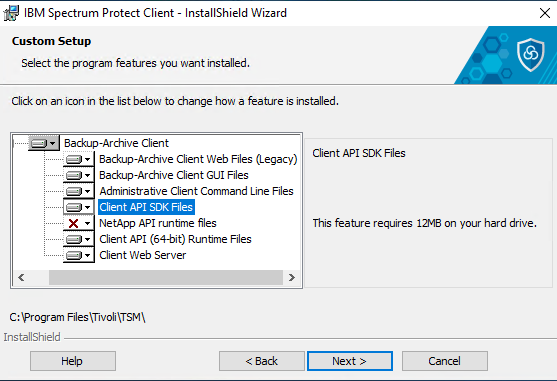
In order for MAGS to update the filespace information, the “Client API (64-bit) Runtime Files” as well as the “Client API SDK Files” have to be installed on a windows system. For linux, please check the IBM Documentation
Note
Much like STORAGE PROTECT itself, MAGS updates the “last backup date” for a file space even if that backup or parts of it failed – so it generally isn’t a good idea to rely on that timestamp as a measure of monitoring the state of your data protection.
Click on “Save backup source” to add this definition to the list of defined backup paths.
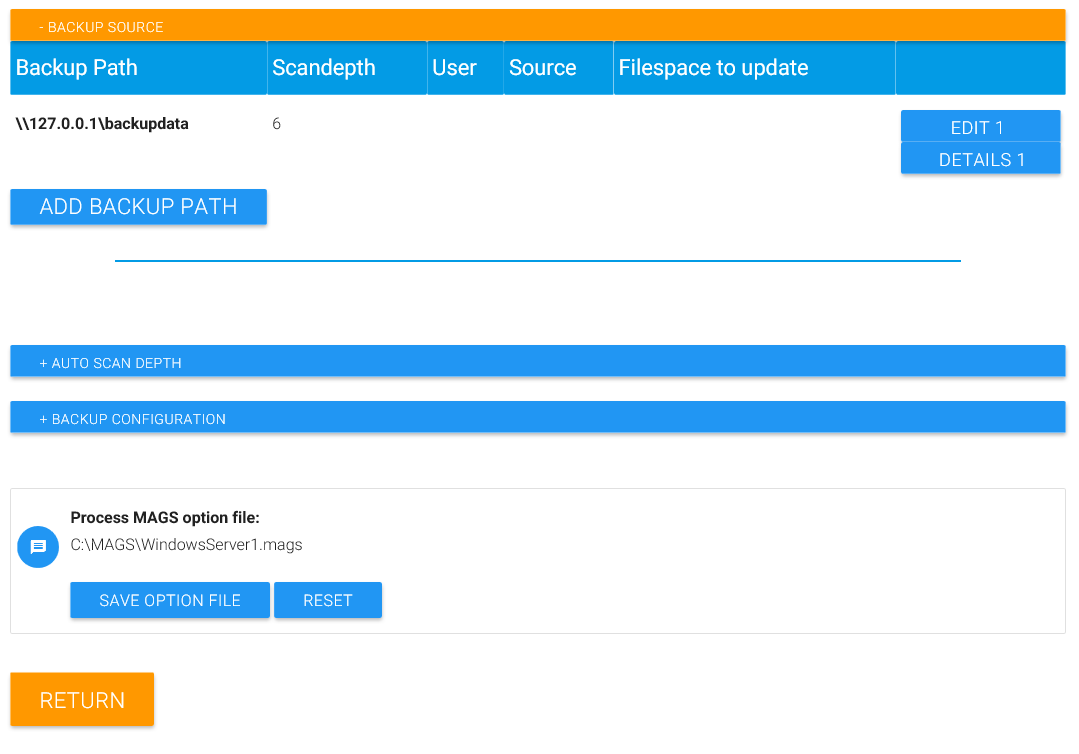
Once you saved the backup source information, you’ll be able to edit it. Click on “Edit” bind the path in question to change any of the information previously provided. You can also remove the backup source from MAGS by clicking on “Remove backup source”.
Click on “Details” if you want to determine or influence how MAGS would back up this backup source. In essence, what MAGS does is to split the directory structure in smaller chunks which can then be handled by STORAGE PROTECT in a more parallel fashion than STORAGE PROTECT could manage on its own. “Details” enables you to preview that activity and influence it. On large shares with billions of files, it may be necessary to scan so deep into a directory structure that many thousands of STORAGE PROTECT jobs result. For a preview, that would be inconvenient and unnecessary. You can therefor limit the number of jobs MAGS previews for the “Details” view by adjusting the “Jobs-Limit” to a more manageable number like 25000. Note again: This will NOT limit the number of actual backup jobs MAGS would run but ONLY the number of jobs previewed with the web interface.
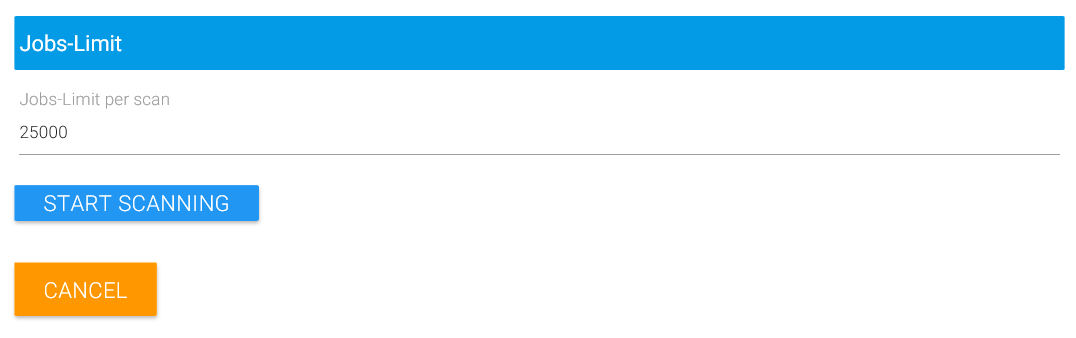
Once you click on “Start scanning”, MAGS contacts the STORAGE PROTECT client and requests a list of excluded directories. These can come from the operating system, the STORAGE PROTECT Option file, an include/exclude list or an option set on the STORAGE PROTECT server. MAGS ignores directories excluded by STORAGE PROTECT from its initial scan and, subsequently, from backup. Once the scan completes, MAGS shows a list of the directories it found, whether it will back them up recursively or not and how deep the scandepth for this directory is. The overall number of jobs found is displayed above the results table (in this case “35”).

Keep in mind that the list displayed is only the current state of the share you want to backup. Once you actually run MAGS, it may have changed and the number and structure of resulting jobs may have changed, too. However, if you know of a particular directory that contains an especially large number of other directories and files, you can increase its scan depth specifically by clicking “Edit” behind the directory name, and increase the scan depth step by step and thus adding even more parallelism to this particular directory structure. You can also exclude a directory from being scanned by MAGS by triggering “Exclude Path” to “Yes”. Note that this will NOT exclude the path from STORAGE PROTECT and thus not expire data already backed up. It merely prevents MAGS itself from processing that directory.
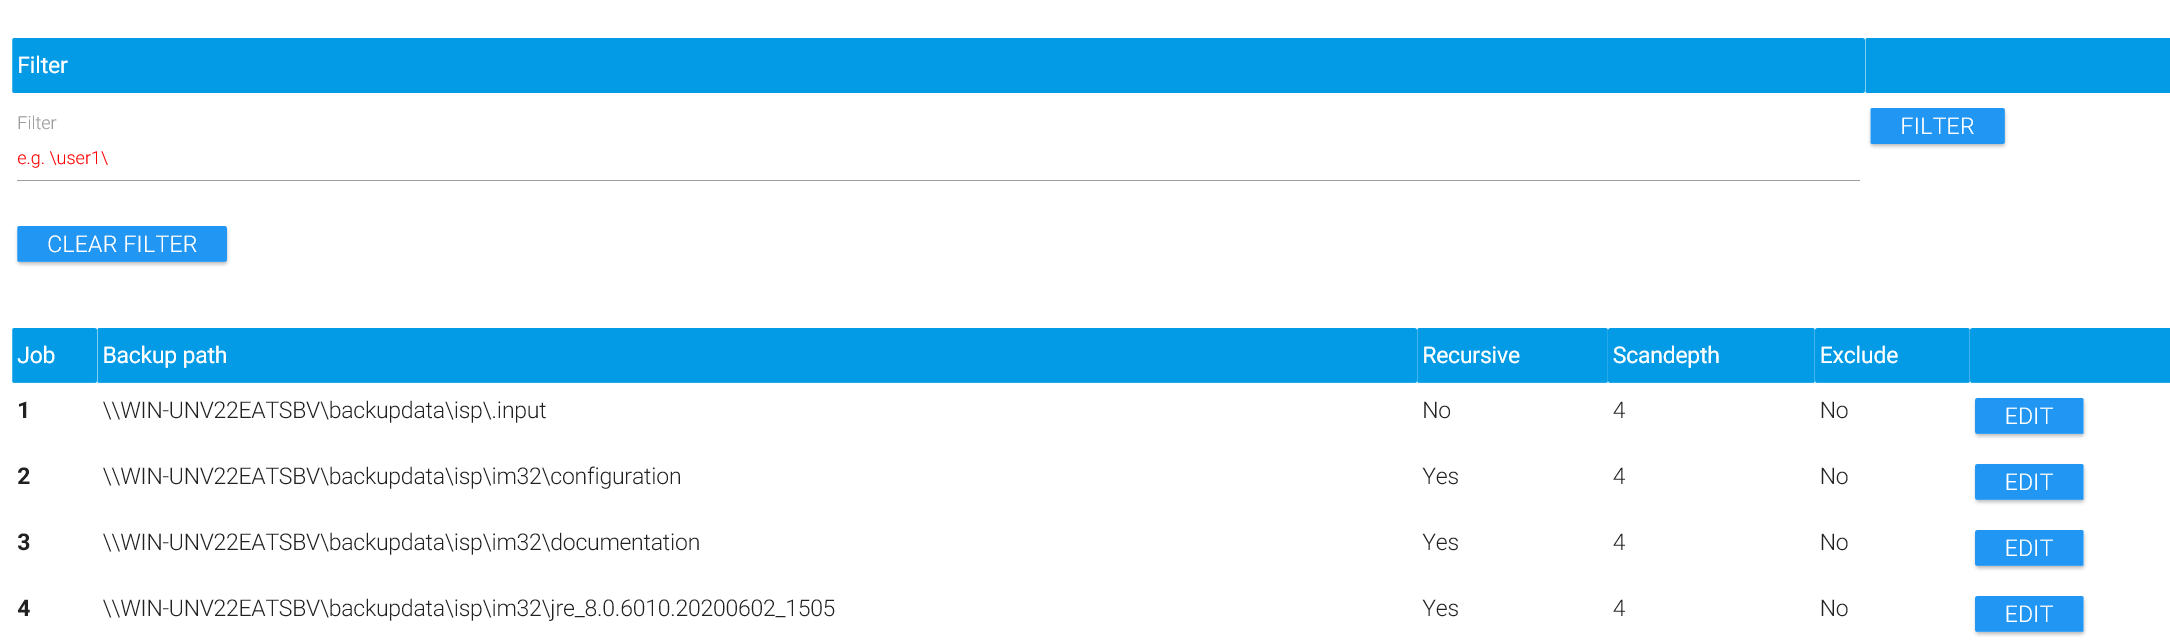
At the bottom of the page, you can configure how many jobs will be displayed.
Click on Next or Return to navigate through the list.
The result list provides a filtering function which helps with finding particular directories. The filter does NOT have an effect backup itself when MAGS is run. It merely helps with finding particular directories in the list.
Adjusting Scan Depths with MAGS is crucial for the overall optimization you can achieve compared with a regular STORAGE PROTECT backup of your backup source. In theory, more jobs should lead to more parallelism and thus faster backups. However, each and every of the jobs MAGS finds while scanning a file system will require their own STORAGE PROTECT session. For establishing a session, there is a certain overhead involved for authenticating the STORAGE PROTECT client with the server, determining what to backup, extracting meta-data for files already stored in STORAGE PROTECT etc. These can add several seconds of overhead for each session which can, in extreme cases, slow the entire process down so much that MAGS could even be slower than a regular STORAGE PROTECT backup. In order to avoid such issues, you should adjust the overall scan depth and scan depths for individual directories in a way that the number of jobs is related to the number of files at a roughly 1:50,000 ratio. That means: For a file system with 50 million files, you’ll probably see the best results if the overall number of jobs created by MAGS is on the order of about 1,000. Depending on data structure, STORAGE PROTECT database performance, network latency and other factors, even 10,000 jobs for 50,000,000 files may be ok. In other environments, the optimum performance may be achieved with 500 jobs for 500,000,000 files. If in doubt, it is certainly better to start with fewer jobs (smaller scan depths) rather than too many.
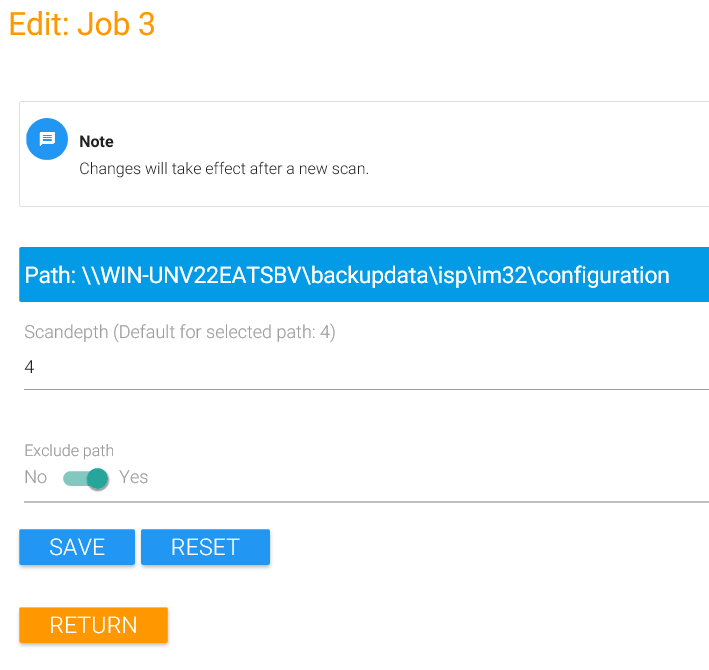
Don’t forget to save changes made to a directory by clicking on “Save”. Changes to both, Scandepth for an individual directory as well as Excluding that directory from MAGS backups, are only reflected after a scan (see above).
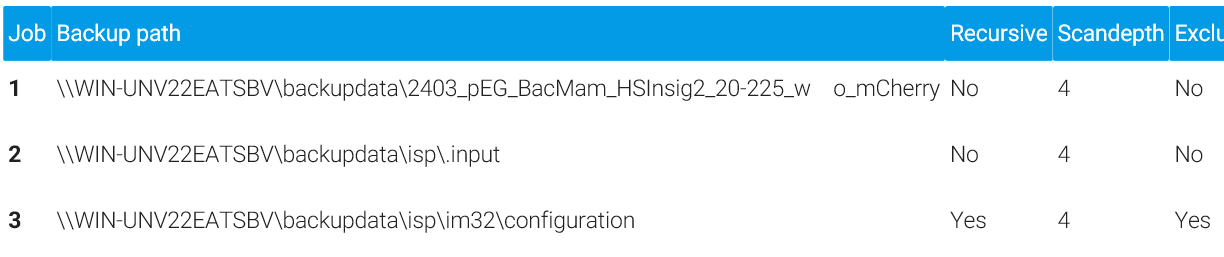
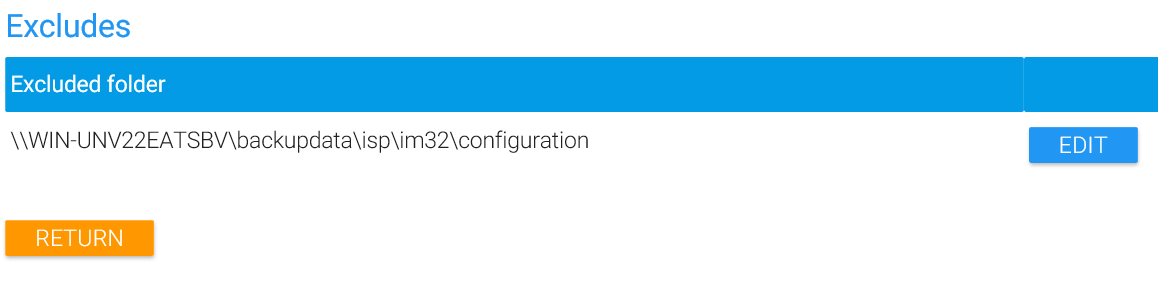
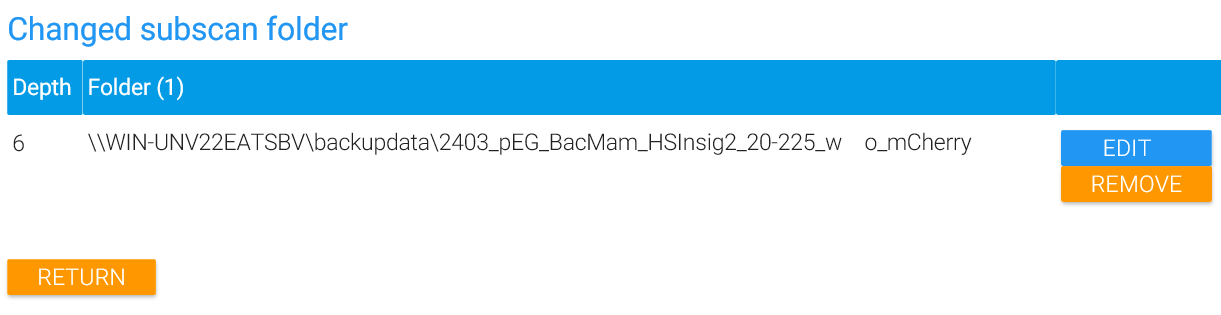
If you lose track of which directories were changed in terms of scandepth or excluded from MAGS backup, you can list only excluded or changed directories. From this view, you can also delete an exclude definition or change individually set scandepths back to default.
Click on “Rescan” to see how your changes effect the overall result.


Click on “Return” or “Overview” in order to navigate backup to the main page.
Add more backup sources until you’ve defined all shares/directories you want to backup with this MAGS option file. Click on “Save option file” after each one and exit the web interface by closing your browser.
Note
Instead of entering individual paths as backup sources, you can also enter the name of a file containing multiple backup sources. This is especially helpful if you have to backup many (hundreds or thousands) of shares and don’t want to add them all individually. That file containing multiple backup sources has to follow these rules. #. Only one backup source (UNC Path) per line is allowed #. If the file contains international characters, make sure it is UTF encoded. #. If an entry requires optional backup sources (snapshots, multiple Isilon nodes etc.), separate it/them from the original UNC path by a <TAB> charcter.
Sample file for UNC paths without optional backup sources:
\\myfileserver1\sharea
\\myfileserver1\shareb
\\myfileserver2\sharec
\\myfileserver3\someothershare
Sample file for UNC paths with optional backup source:
\\myfileserver1\sharea                 \\myfileserver1\.snap
\\myfileserver1\shareb                 \\myfileserver1\.snap
\\myfileserver2\sharec                 \\myfileserver2\.snap
\\myfileserver3\someothershare         \\myfileserver3\.snap
Sample file for UNC paths with multiple optional backup sources:
\\srv1\sharea \\srv1-node1\sharea,\\srv1-node2\sharea,\\srv1-node3\sharea
\\srv2\shareb \\srv2-node1\sharea,\\srv2-node2\sharea,\\srv2-node3\sharea
Auto scan depth
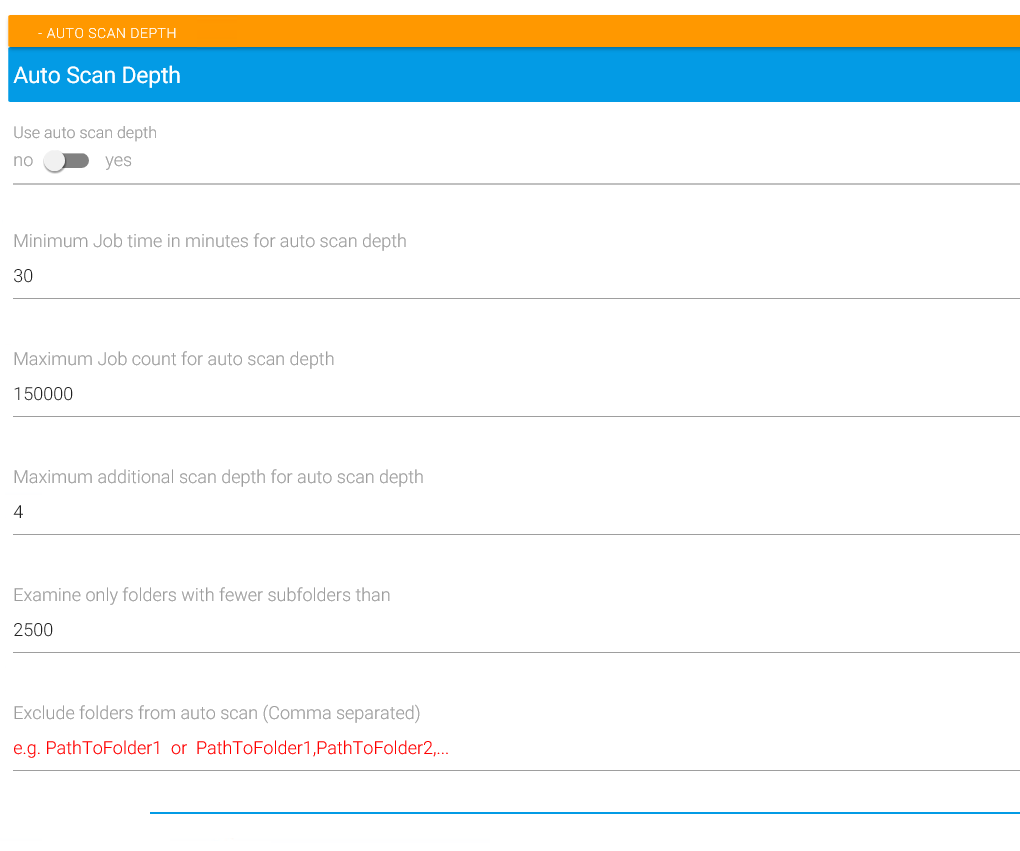
Use auto scan depth
Rather than determining yourself which directories may require more parallel processing and thus giving them a higher “subscan” value as shown above, you can activate automatic scanning by activating “Use auto scan depth”.
If the overall number of jobs:
doesn’t exceed Maximum Job count for auto scan depth, and…
the scan depth for the jobs in question isn’t already higher than the general scan depth by the amount specified as Maximum additional scan depth for auto scan depth, and…
if the number of subdirectories on the first level below the directory handled in that job isn’t higher than the value given under Examine only folders with fewer subfolders than,
MAGS will introduce a new subscan entry in your MAGS option file for that directory which will take effect in the next backup run.
If MAGS determines that the changes introduced by auto scan depth didn’t have a positive effect, it will revert them after the backup has finished. Changes done to these setting typically become apparent over the course of two or three backup runs and stabilize over time. It is recommended to not change any of the values drastically and stick with the defaults unless one of them obviously doesn’t fit your specific requirements. We also recommend to start with auto scan depth only once reasonable backup operation has been established with the scan depth you chose during initial setup.
After each backup, MAGS will look at each backup job and interpret the results against the Auto Scan Depth options as follows:
Minimum job time in minutes
Only jobs running longer than “Minimum Job time in minutes for auto scan depth” are evaluated. So if your backup produced 1000 jobs and two of them took longer than 30 minutes, MAGS evaluates these two jobs. Jobs which took less than 30 minutes will remain unchanged.
Maximum job count
MAGS’ auto scan depth will not create more jobs after the specified number of jobs has been reached.
Since Auto scan depth is a function that runs after the backup is completed, the changes in depth will be taken into consideration for the following backup. Because of that auto scan depth can still create more jobs than specified with the Maximum job count value. After the next run with more jobs than configured, MAGS will recognize that the maximum job count has been reached and will not add additional jobs for this path.
Note
Example: Let’s say the limit for max jobs is set to 16.000 and a backup just completed with 14.000 jobs. Auto Scan Depth will propose to go to a deeper level for a path which does not exceed the limits defined by the other settings, so the next backup produces 20.000 jobs. The backup will be performed normally, regardless the Maximum job count value.
Maximum additional scan depth
Auto scan depth will not create jobs in levels beyond the value specified here. Example: When backing up the path: C:backupdata With a scandepth of “3” (configured in the Backup Source part of the configuration) and the default setting of “4” for additional scan depth, MAGS will create jobs for up to 7 levels in the directory structure:
C:\backupdata\this\is\ (Defined Scandepth of "3", starting level for "Auto Scan Depth")
C:\backupdata\this\is\a\really\deep\folder\ (Scandepth "7" - This is the last level for Auto Scan Depth to create jobs for)
C:\backupdata\this\is\a\really\deep\folder\structure\tree\for\backups (Scandepth "11" - Auto Scan depth won't create additional jobs for this level)
Examine only folders with fewer subfolders than
Folders with more subfolders than specified here (default: 2500) will not be processed by auto scan depth consideration.
Bunch configuration
When using MAGS, we make use of parallelisation of jobs on a huge scale. Depending on the directory structure of the backup source, this can lead to hundreds of thousands of backup jobs, from which only a few are actually processing the most amount of data. In order to reduce overhead for small backup jobs, mostly those not doing anything but connecting to the ISP server to commit nothing at all, MAGS supports “bunching” of those jobs.
Caution
The STORAGE PROTECT client (and thus, MAGS) does not allow the use of the “SNAPSHOTROOT” parameter when backing up more than one path at a time. If you want to use bunching with MAGS, be aware that bunched jobs will not be utilising the “SNAPSHOTROOT” parameter. Non-bunched jobs are not affected by this.
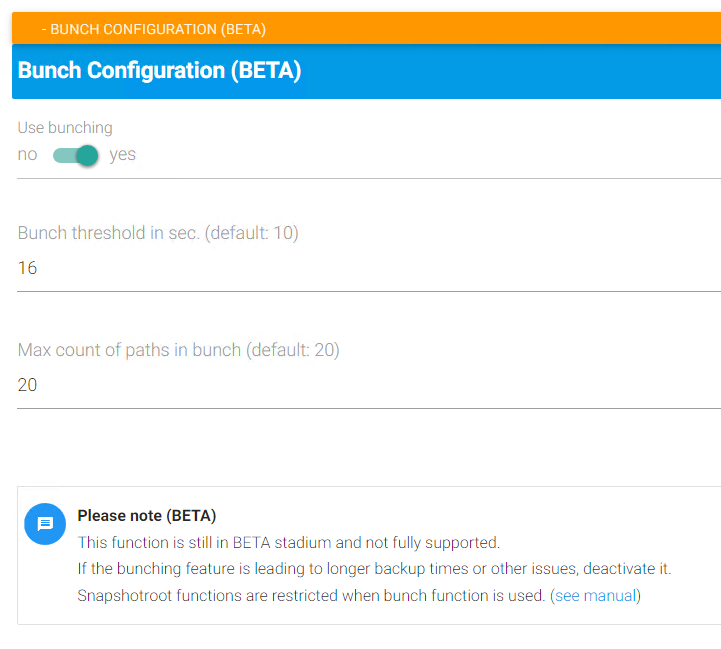
The bunching feature will take jobs which take time up to the value configured in Bunch treshold in sec. and merge those in bunch jobs, with every bunch job having up to “Max count of paths in bunch” paths.
Note
Per default, bunching is disabled. If you are using the Auto scan depth feature and experience that the backup runtime is becoming slower after exceeding a certain number of jobs, consider activating bunching.
Bunch treshold in sec.
Only paths which took less than or equal the specified number of seconds to complete (default: 10) will be bunched together.
Max count of paths in bunch
A single bunch job can contain as many paths (default: 20) as the value specified here. After reaching the maximum, a new bunch job can be generated.